Rick's b.log - 2022/08/14
You are 18.225.95.229, pleased to meet you!
Rick's b.log - 2022/08/14 |
|
| It is the 21st of November 2024 You are 18.225.95.229, pleased to meet you! |
|
mailto: blog -at- heyrick -dot- eu
Since it was baking hot and I had nothing to do, I decided to clean some things. Some stuff that needed a good cleaning, but would not in the normal scheme of things, be considered cleanable.
But, around here, "normal scheme of things" does not apply.
The first thing that needed to be cleaned was the hairdryer. Mom used to use it, and I've taken it over because it's pretty good at doing what it does. The only problem is that the slide switches to select a temperature and/or fan speed are a bit gunked up. When you need to strike the switch with the back end of a spatula to turn it on or off, that's when you know it needs to be cleaned.
The hairdryer is not ordinarily fixable due to having weird screws that are like straight head screws with a little lump in the middle.
Supposed to be.
Two H screws in the handle, and two regular philips screws at the back under the mesh filter and a clip-together shell and it was possible to strip this thing down to electrics and casing, in order to clean the casing.
The plastic casing and the slider buttons (you can see the internal parts, the L-shaped blue things) were washed in warm soapy water, then left on the front step. The baking sun dried it all in minutes.
Getting the hairdryer back together was a pain in the bunghole as the clip-together parts had very little play and needed rather a lot of force to get clipped together. But, that being done, it was a simple matter of putting the weird screws back in place to hold the handle tightly closed, and job done.
I went and washed my hair (again!) in cold water, because I was hot, and dried my hair for about thirty seconds before figuring that blasting hot air at my head was the last thing I needed. So I let it air dry. Still, hairdryer worked fine...
Two dinky screws on the bottom, and the rest of the case was held together with an awkward clip arrangement - either side in the middle, and either side at the top.
The electrics could be removed by undoing the four screws holding it in place. Then the casing could be washed, and dried.
I didn't strip it down any further than this. There's no point. The heat pump would be a square, probably about an inch or so across, with two heavy duty wires attached. It consumes a lot of energy (~60W at 12V) and gets hotter on one side (the top of the photo) and correspondingly colder on the other (the bottom of the photo).
What I found a little more interesting was the control board.
There are six LEDs around the button. Three are green (normal) and three are yellow (water tank full). The named chip is an NCE3018AS which is a power MOSFET. This will be used to switch the heat pump on and off. The unnamed chip beside it is... the state of the two switches (tank fitted and tank full) and the button go to it, and it looks like outputs control the LEDs and the heat pump.
Reassembly was simple. Screw the main bit back, clip the thing together, screw up the internal wire cover, and don't forget the two little screws at the bottom.
The controller is electronic, although for all the fancy settings (defrost, etc) it just behaves like a straight timer. There isn't even a thermostat to alter the timing for an already-hot toaster.
I did fix the release. Previously, when toasting had finished, the spring was very weak so the arm moved "just a tad". Hmmm...
So: baking hot, check. Trees dead, check. Other trees dying, check.
I know people want sunny weather for their holidays, but I wonder if people aren't happy to see the back of it. I want for a few walks this afternoon. Got a bit wet at one point. It was... pleasantly chilly. I think 22°C or something? Beats the top half of the thirties.
I decided to have a crack at making a cake in my multicooker.
With no recipe.
Yup, I was just winging it.
It's just flour (and raising agent), sugar, eggs, and butter. How hard can it be?
First up, I greased the cooking pan. This is really important, as without this, it'll go horribly wrong.
Once that had been done, two medium sized eggs were thoroughly beaten. Then taken outside and whipped until they screamed.
100g of sugar was thrown into the eggs, and the whole lot whisked on the slow setting for a bit longer.
Afterwards, 100g of unsalted butter was broken into nuggets (using a teaspoon) and added to the mix. Small chunks to avoid over-stressing the mixer.
Then, 3g of raising powder was added. Gotta make this cake fluffy.
Then 100g of plain white flour. Type T45 in France, though I'd be lying if I said I knew what the hell the T numbers actually meant; this was just the "plain white flour" on the shelf.
The reason for the sifting is because lumps of butter, no big deal. The heat will sort that out. Lumps of flour? Very big deal. Yuck.
The mix was plopped into the cooking pan, and checked to ensure it was flat and level.
The little handbook suggests the default bake setting (130°C for 45 minutes) is best for cake, so... close the lid and set that.
Actually, I lie. As it was the default setting, I set nothing. I just picked the Bake programme and pressed the Start button.
45 minutes later... a wooden stirrer inserted came out clean. It's cooked.
I removed the cooking pan from the multicooker and put it on a rack to cool.
But I'm a little impatient, so I helped it cool...
When it was cool enough (level three blowage did it in about five minutes from oven-hot), I put a piece of greaseproof paper into the pan and flipped the whole thing over. The cake came right out onto the paper, so I could transfer it to a plate by laying the plate on top of the cake and then flipping it.
The result was... like a giant pancake.
Well, not a bad cake, but not a good cake either. It was a bit dry. And very very greasy. Somewhere between a cake and a muffin, big and flat.
So, for next time... make up twice as much cake mix. I think the problem was because it was so thin, it overcooked. In this instance, use the same amount of butter for twice as much of everything else.
It also didn't rise much, so it might do to beat fifty shades out of the eggs, and then mix up everything else separately, folding in the egg at the last moment.
Still, it wasn't terrible. It would probably be alright swimming in custard.
Hmm... I have some Bird's Custard powder. That gives me an idea.......
Cleaning a hairdryer
I decided to have a no-computer day on Friday. I did allow myself the phone, but no sitting at the Pi.
Technically, it is known as an H type screw. It's supposed to be tamperproof.

Weird screws? Bring it...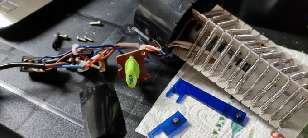
Hairdryer viscera.Cleaning the dehumidifier
This was awful, actually. Having run for a long long time (except in the winter when it freezes up) it had dust all around it, and little black bugs (fruit flies?) and moths that got in when the window was open and went to seek shelter. It looks like they were aiming for the cold side.
At any rate, it needed a clean.
I undid the middle clips by fashioning an L-shaped tool out of a thin but firm piece of metal, like a coathanger but thinner. It might have originally been from a cooling rack that I cut down in size to fit inside the halogen cooker?
With these unclipped, I could open the casing enough to just have a crack between the two halves of the upper clip. A thin flat head screwdriver down there, a gentle tap to release the clip and job done.
Almost. The lid was clip-on too, but these clips (two at the front, two at the back) were accessible with a regular flat head screwdriver.
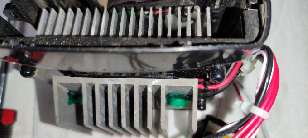
Peltier effect heat pump.
As you can imagine, with heatsinks of these sizes, thermal bonding is important, so I had no plans to mess with that by opening the thing up.
Seriously, they look like this (Amazon link) and cost €6-10(ish).
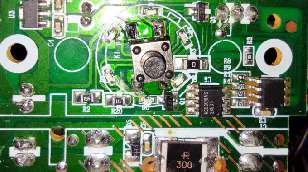
Dehumidifier control board.
Something like the PIC 12F629 would do the job. With a 4MHz RISC processor core, 1024 bytes of Flash, 64 bytes of SRAM, and 128 bytes of EEPROM, it's probably overspecified for even this job. But it, a cheap little microcontroller, is probably going to be less expensive than doing the controls and flashing LEDs with discrete logic.
Cleaning the toaster
Cobwebs, old crumbs, etc. There are no photos as this wasn't able to be stripped down completely. It looked like some of the wires had been soldered into place after it was partially assembled. However I did get it apart enough to clean the upper casing and to brush out the crap on the inside. It's been a while since I made toast, it's more a winter thing don't you think?
Interestingly, there is a solendoid that keeps the internal rack in the down position while toasting is happening, and this solenoid appears to have a secondary winding that powers the control board. But, like I said, I wasn't able to strip it down enough to get access to these parts. I'm going to go out on a limb and say it's probably a PIC or... if this this was made in China, some sort of microcontroller based around an 8051 clone.
So I picked a position partway along the spring and fitted that to the arm. In a test, the arm retracted nicely, and threw the toast right out of the toaster. So, maybe a bit too much?
I opened the toaster again and changed the spring position. Now it retracted nicely with the toast jumping a little (but not flying). Perfect.
Saturday - the final hottest day
...elsewhere in France, loads of trees on fire, sadly... check.
Sunday - the day after
Trying to bake a cake in the multicooker
I felt like making a cake.

Grease the cooking pan.
And since that's all very tiring and bothersome, I handed them the whip so they could whip themselves.
Which they did.
And they were grateful for the punishment.

Pity these eggs.
Sugar makes everything better.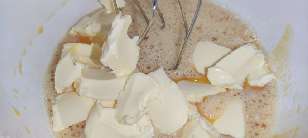
How to make a mess.
No picture, it's 3g, you'd not even see anything.
This was not whisked. It was sifted into the mixture and gently mixed up using a rice paddle (first flattish thing I picked up).
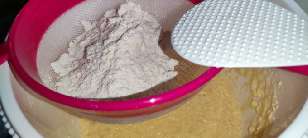
Mix in the flour.
And the reason we don't mix is because essentially the flour is to bind together the egg/sugar/butter mix, but if it gets blended in with the mixer then it risks losing the airiness.
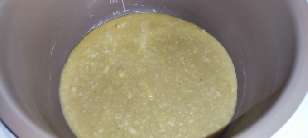
Getting ready to cook.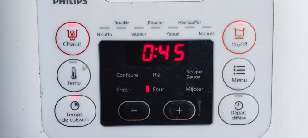
Cake setting: 130°C for 45 minutes.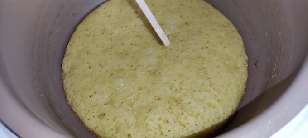
One finished cake.
Helping the cake to cool.
Which I dusted with icing sugar, because, no such thing as too much sugar. ☺
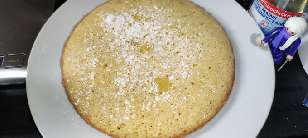
The end result.
David Pilling, 16th August 2022, 16:51 J.G.Harston, 17th August 2022, 17:27
| © 2022 Rick Murray |
This web page is licenced for your personal, private, non-commercial use only. No automated processing by advertising systems is permitted. RIPA notice: No consent is given for interception of page transmission. |