Rick's b.log - 2024/03/28
You are 18.119.213.225, pleased to meet you!
Rick's b.log - 2024/03/28 |
|
| It is the 18th of December 2024 You are 18.119.213.225, pleased to meet you! |
|
mailto: blog -at- heyrick -dot- eu
Using a multimeter, I worked out where I could tap in to get a +24V supply, and where to inject the 3.3V for the electronics.
Once the hooks were in place, I powered up the printer and adjusted the output until it read 3.3V.
That done, time to power down and attach the red wire to inject the 3.3V into the machine. The regulator has the ability to cope with 3A, though, maybe not for extended durations as there's no heatsink other than that built into the chip. At any rate, it ought to be enough to get some signs of life from the circuitry.
Only it didn't.
I measured the little motherboard's input as 3.14V, so I adjusted the power supply until it read 3.5V, which was 3.32V at the motherboard.
So I think I'm going to have to accept that it's a dodo.
On the other hand, I have a module that can generate a useful voltage of my choice from a wide range of inputs. I think the input can be around 5V to 40V, and the output can be about 0.5V to 36V. The only limitation is that the output must be less than the input.
Even better, without changing its setup at all, I hooked it to the 12V supply for my keyboard and got a nice steady 3.3V out of it. So the output is controlled independently of the input. Nice.
It turns out that two bytes were being sent at the beginning of every pixel data transfer. I'm not sure what they were for, and it certainly seemed as if the original SSD1306 driver wasn't bothered by their presence, as the output looked okay on my old OLED.
So I removed those bytes and rebuilt the project... and cried a little at realising that I started my OLED driver module ten years ago. Damn, time passes too quickly.
The archive below contains the OLED module, some tests and examples, documentation (don't worry that the documentation is for OLED v0.04, there have been no API changes), and the source code. It is licenced under the EUPL version 1.1.
My laser printer is dead
As storm Nelson blew outside, I opened up my laser printer.
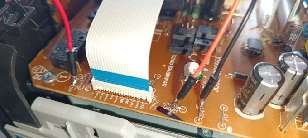
Adding some hooks (red=3.3V, orange=24V, black=0V).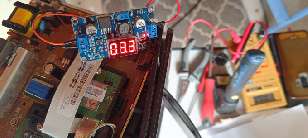
The output power set to 3.3V.
Probing around, something was 1.8V so if there is stuff running at 1.8V (not unheard of), then there's power getting into the board. But no signs of life when I pressed the power button.
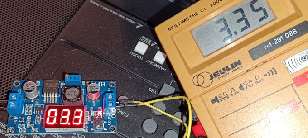
3.3V on half the previous input.OLED module update
When I hooked up the new OLED to my Pi, I noticed that data sent using my OLED module was shifted to the right by a couple of rows, and thus slightly corrupt.
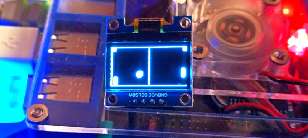
128×64 OLED showing a slightly corrupt output.
The newer SSD1315 that's in the replacement display was less willing to tolerate this extaneous data, and thus corrupted the display by interpreting these bytes as pixel data.
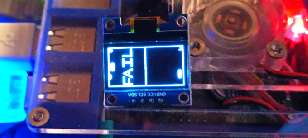
128×64 OLED showing the expected output.![]()
Just messing around. ☺
For RISC OS machines.
David Pilling, 29th March 2024, 03:12 Joseps, 29th March 2024, 08:54
Thinking about it now I see the pics, maybe the 3.3 linear regulator that feed that line (as that probably is how it was fed) could be the one shorted and hence, messing with the buck converter supply.
Removing it could help, although once removed just testing it outside the circuit would be even better. If good, then there might be an intermediary power supply in the board being be the one failing, which could also be affecting other secondary voltages.
| © 2024 Rick Murray |
This web page is licenced for your personal, private, non-commercial use only. No automated processing by advertising systems is permitted. RIPA notice: No consent is given for interception of page transmission. |